Click the image to see full size.
In this tutorial im gona explain how i made my smile@life taq/sig.
First you need to have a idea of what you want to make, i knew what i had in mind when i started so i wend on google to find the matching stock wich would fit my idea. After doing that i made a sketch/collage in a new document wich is the same size as the taq/sig i am gona make. I started with the bottom layer and worked my way op until i had a pretty good idea of what i want. Keep in mind it a collage of what you wand it doesnt have to be very precise. I kept this document open during the taq/sig to keep as reverense. This is the idea i had.
This is how it came out.
You can see it follows the collage i made.
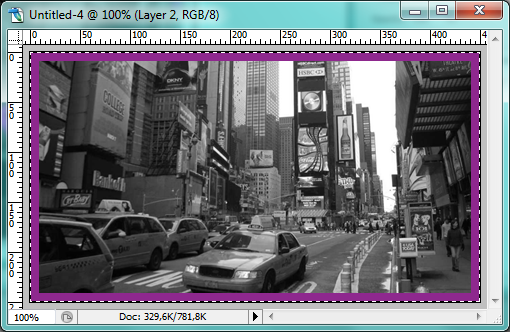
When i started the actual sig/taq i started of with a new canvas, size 450x250, with a bright pink background. because it is easyer to see the diffence between stock and empty background.
Ive donne the background and the wall before i did the dog. The first stock i put in the document is the wall i wand the dog to hang over. i placed it to my likings and removed everything i did not want in the final peace. To erase the parts you kan use what you like best, i prefer the eraser.
The wall inst in the background, so the next layer has to be put behind the layer with the wall, now im gona put in the cactus, again ive scaled it and removed parts i didnt want. I draged the layer below the wall layer in my layer menu.
Now the base is almost done only the sky left, the sky most be behind the cactus, zo i placed it and moved it below the cactus layer.
To make it easyer ones you get many layer you can name your layer in the layer pallet, ive named mine “wall”, “cactus” and “sky”. And ive put them in a folder.
Now im gona add the dog, this is gona be above all other stock layers, and im gona place it so that the paws go over the wall, then i removed al parts i didnt need. and named the layer “dog”.
Next im gona make a new layer underneath the dog layer, and name this “shadow dog” on this layer im gona do some brushing to ad some black shadows under the dogs paws on the wall. I used a soft round brush. You might need to lower the layer opacity to make it look good.
Looks pretty nice alreay, but to make it more fun to watch where gona add some more stuff, Now im gona open a stock of a baby with some nice eyes, and gona cut out the eyes from that and past them on a layer above the dog, ive set that layer to luminosity, so that the colors will match nicely. To remove the sharp edges i used a soft brush eraser on lower opacity. I did one eye at the time, depending on your work you might need to scale and rotate the eye to get them placed right. I named my layer “left eye and right eye”
Now im gona do the same with the mouth, i opend a nice mouth stock placed it in my taq/sig above the dog and scaled it to fit the dog nicely, again i erased the sharp edges to blend in nicely and put the layer on luminosity. And named the layer “Smile”
Now i kept the layer selected with the smile on it, and used the polygonal lasso tool to select the teeth between the lips, then i hit ctrl+j to copy the teeth ive just selected to a new layer, but because i used ctrl+j while is is selected it stayes in the same place. Then i put the layer on Normal. And ive named it “Theet”
You can also do the same for the lips, as the teeth to give the dog red lips. i preferd it whit dog hair toned lips, with red lips it looks like this
Keep in mind that when your placing the eyes and smile that you have some skin around the eyes and mouth, this gives more room to blend it in.
Now i am gona add some detail to the peace, ive opend up my favorite flower stocks, 2 different ones, one yellow flower one pink. Ive copyed them to the sig/taq and scaled them as needed. Then ive put 3 flower on the cactus and 2 on the wall. Keep in mind that you are still working above all other layers. Ive named the flower layer “yellow flower and pink flower”
Ive also added a shadow to the flowers to make them fit in nicely, ive did this in the layer blending options menu, this depends on wat you like and what you think looks good. this how it looks so far.
Now for the final detail i am gona ad a ladybug to the dog, ive opend it up and copyed it to my peace, then scaled and removed all unwanted parts. i wand it to look like its walking on the dog paw/shoulder. So i added the same shadow as on the flowers,
Keep in mind that you have the same settings for the shadow on all the layers you use it on . Ive named the layer “ladybug”
Now lets ad a curves layer , this wil make it al fit a little beter togheter.
Now make a new layer, and go to image/apply image. This give you a layer with al layer merged on it. Now gaussian blur this layer (filter/blur/gaussian blur) on a radius of 1.
Then take out the eraser and remove everything exept some blur on the edges, this will just add a little focus.
last thing i did was ad some simple text in a dark tone, in font arial. and its finnist .
This tutorial is ment to give you a idea and some tips on how to combine stock into one complete new image.
Below you can find all the stocks ive used to make this sig/taq
This tutorial is writen by Johan Schats 2012


.jpg)
.jpg)
.jpg)
.jpg)
.jpg)
.jpg)
.jpg)
.jpg)
.jpg)